Traditional marble loaf cake
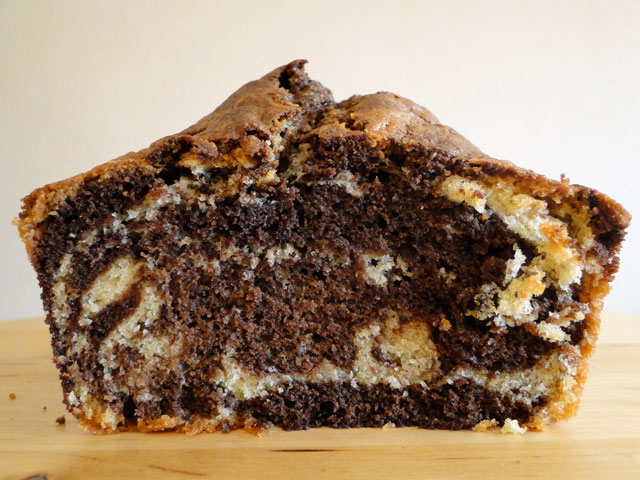
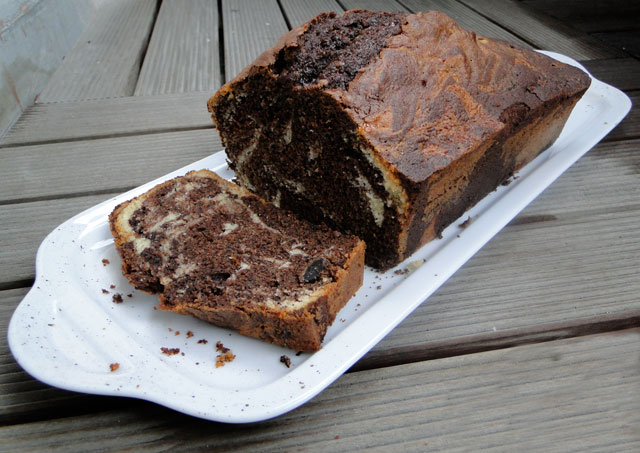
 I don't how how a marble cake is supposed to look like!! All I know is that marble cake brings up so many childhood memories. The basic idea behind the marble cake is that you alternate layers of contrasting batters in a loaf pan, so that you get a beautiful visual effect in each cut slice. There are many methods to create marble-like swirls, I followed Dorie Greenspan's recipe and it worked out perfectly.
Ingredients: 2 cups flour plus 2 tbsp all-purpose flour - 1 ¼ tsp baking powder - ½ tsp sea salt - 1 ½ sticks (12 tbsp or 170g) unsalted butter, at room temperature - 1 cup sugar - 4 large eggs - ½ tsp pure vanilla extract - ½ cup whole milk - 4 oz (110g) bittersweet chocolate, melted
Preheat the oven to 325˚F (165ºC). Butter an 8 ½ x 4 ½ x 2 ½-inch loaf pan, dust the inside with flour and tap out the excess. Place the pan on an insulated baking sheet or 2 regular baking sheets stacked one on top of the other.
Whisk together the flour, baking powder and salt.
Working with a stand mixer with a paddle attachment, or with hand mixer in a large bowl, beat the butter on medium speed until smooth, about 3 minutes. Add the sugar and beat for another 2 to 3 minutes. Add the eggs one at a time, beating well after each addition. Don’t be concerned if the batter curdles and stay curdled-it will be fine. Beat in the vanilla. Reduce the mixer speed to low and alternately add the flour mixture in 3 additions and the milk in 2 (begin with the dry ingredients), mixing only until each addition is incorporated.
Traditional method: Divide the batter in half and stir the melted chocolate into one half and keep the other half plain. Drop spoonfuls of dark and light batter randomly into the pan, and then plunge a table knife deep into the batter and zigzag the knife through the batter, making only about 6 to 8 zigs and zags. Scrape the batter into the pan.
Bake the cake for 1 hour and 20 to 30 minutes, or until a thin knife inserted deep into the center comes out clean. If the cake looks as if it’s getting too brown during its bake, cover loosely with a foil tent. Transfer the cake to a cooling rack and let it rest for about 15 minutes before unmolding, then cool the cake to room temperature right side up on the rack.

Gâteau marbré
Ingrédients: 240 g de farine - 1 ¼ càc levure chimique - ½ càc sel - 170 g beurre ramolli - 4 œufs - ½ càc extrait de vanille - 120 ml lait entier - 110 g choclat noir fondu
Préchauffez le four à 165ºC. Graissez et farinez un moule à cake (21 x 11 x 6 cm) puis ôtez l'excédent de farine en renversant le moule et en le tapotant. Placez le moule sur une plaque de cuisson ou sur 2 plaques superposées.
Dans un grand bol, versez la farine, la levure et le sel et mélangez bien. Réservez.
Dans un bol pâtissier, battez le beurre ramolli anuellement ou avec un batteur éléctrique à vitesse moyenne jusqu'à consistance lisse, environ 3 minutes. Ajoutez le sucre et battez pendant encore 2 à 3 minutes. Ajoutez les œufs un à un, en battant bien après chaque addition. Ajoutez l'extrait de vanille. Versez la farine en 3 fois et le lait en 2 fois (commencez par les ingrédients secs) en mélangeant doucement après chaque addition.
Méthode traditionnelle: Divisez la pâte en deux et versez le chocolat fondu dans l'une des 2 moitiés. Versez la préparation dans le moule en alternant une cuillère de pâte à la vanille et une cuillère de pâte au chocolat. Faire des vagues dans la pâte avec un couteau pour obtenir de belles marbrures dans le cake.
Enfournez et laissez cuire le gâteau pendant 1h20 ou 1h30 environ ou jusqu'à ce qu'un cure-dents piqué au centre du gâteau ressorte propre. Si au cours de cuisson, le cake brunit trop vite, couvrez-le d'une feuille d'aluminium. Laissez tiédir 15 min sur une grille avant de démouler.
Looks delightful. Nothing's better than a traditional marble cake.
ReplyDeleteA little vanilla, a little chocolate, this marble cake satisfies everybody!
ReplyDeleteit's looking delicious :)
ReplyDeletei will try spinach brownie..
Perfect! Did you use the traditional method to make the swirl?
ReplyDeleteHello, thanks for the comments. Yes I used the traditional method for the swirl. Enjoy :)
ReplyDeleteWe offer fair prices on Marble Cleaning so you don’t have to do it yourself.
ReplyDeleteWow! This is superb cake recipe found here.... Really its great. Thanks a lot for the share... Keep posting such an amazing blog post here. Keep it.
ReplyDeleteThanks!
Good Job! You have Shared your well knowledge... I will refer the people to the company for best Marbles in USA click the below link:
ReplyDeleteUSA Marble
wholesale marble blog
US marble and granite
marble products
selling marble
wholesale marble tile
marble distributors
gallery marble
white marble sink
The marble loaf cake recipe on ChiCho's Kitchen is a delightful find! The detailed instructions and vivid photos make it seem like Cake Making Classes in Chennai could be right in your own kitchen. The step-by-step guide ensures even novice bakers can achieve a beautifully swirled, moist cake. I appreciate how the blog combines traditional techniques with accessible ingredients, making it perfect for anyone eager to hone their baking skills. As someone interested in enhancing my culinary repertoire, this post has definitely inspired me to explore more recipes and perhaps even consider joining cake-making classes in Chennai to master this art form further!
ReplyDeleteThe traditional marble loaf cake recipe from Chicho's Kitchen is a delightful find for baking enthusiasts in Chennai seeking to perfect their skills. With its clear instructions and tempting visuals, this blog post not only teaches how to create a moist, marbled masterpiece but also hints at the expertise available in Cake Classes In Chennai. Imagine refining your techniques under expert guidance, mastering the art of swirling batter to create stunning patterns just like in this recipe. Whether you're a novice or seasoned baker, exploring such resources can elevate your baking prowess and inspire creativity in every slice of cake you bake.
ReplyDelete